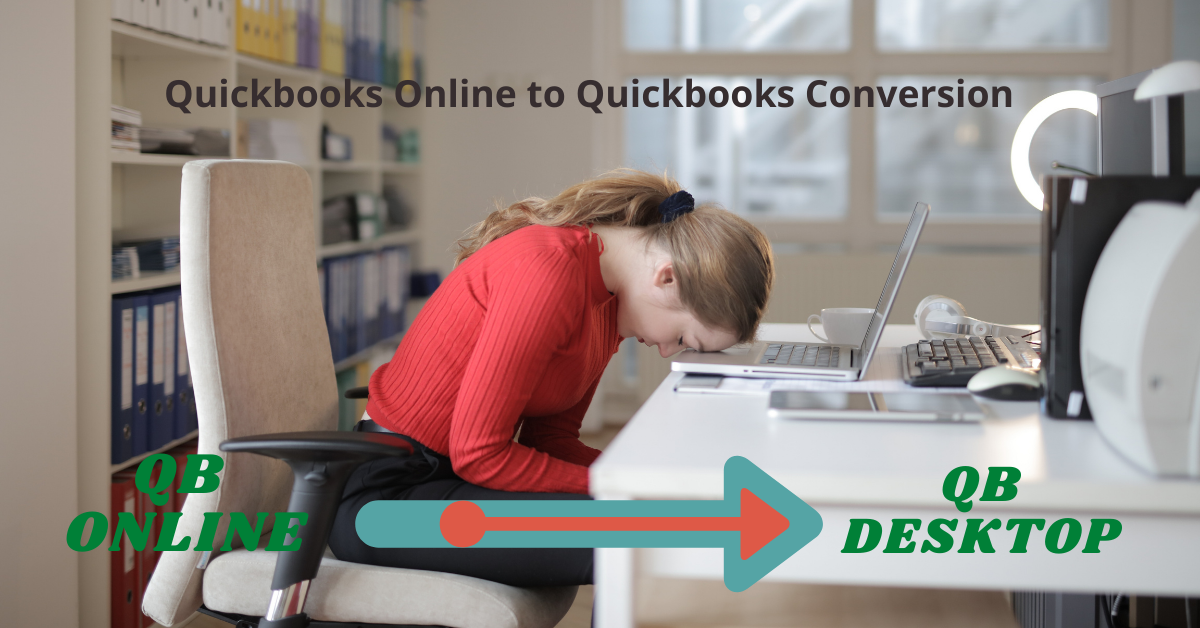
If you are are on this page then for sure you are having difficulties convering your quickbooks online file to quickbooks desktop.
I recently tried to migrate a quickbooks online file to quickbooks desktop & realized that intuit has removed the ability to do so & only gives you the option to export lists & reports in Excel which can be imported in Quickbooks desktop but if you need transaction as well then you need to buy an App to do that as shown in the screenshot.
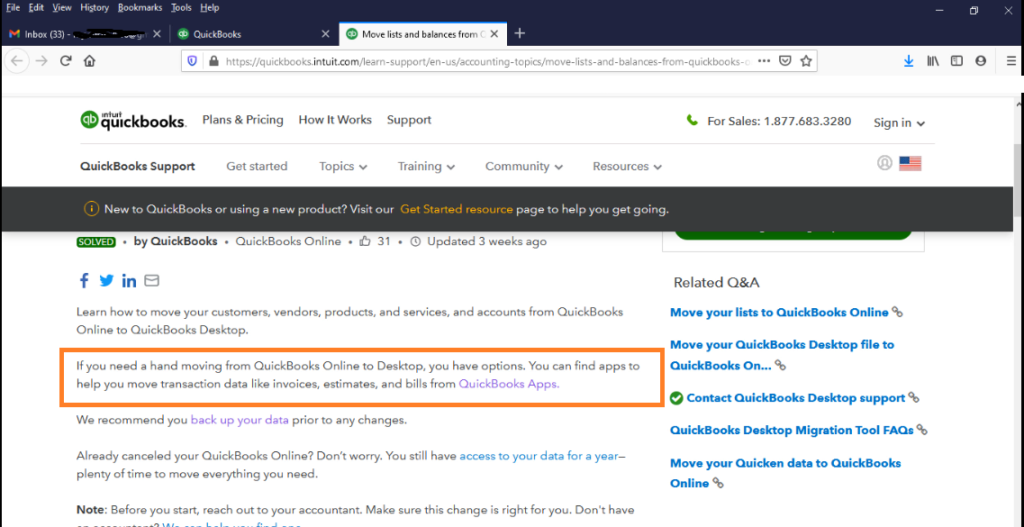
Intuit had been trying very hard to stop this feature since a long time by keeping the pop-up screen too large making it impossible to click & proceed further or the pop-up screen not happening and many more & finally they have completely stopped it & cannot be done via a 3rd party tool.
Now there are several different Apps to do that but can it be done for free without spending any money on an App?
For now, the Answer is YES. not sure when this feature would be removed but for now it’s 100% working & to do this trick the manta is “export qbo data to qbdt”. Let’s see how it’s done step by step without spending a single penny & feel free to buy be a coffee it the trick works for you. 😉
Step – 1
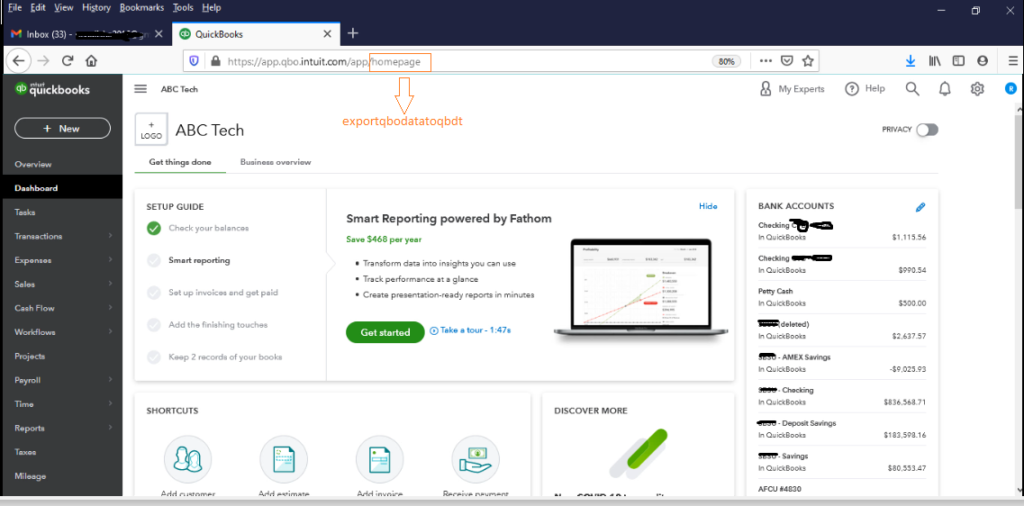
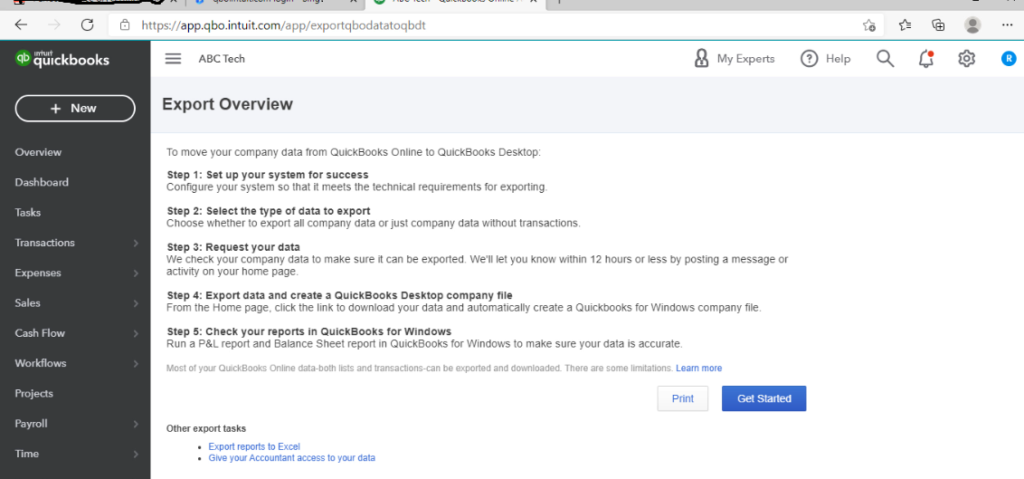
Login to your Quickbooks Online account. Once you are logged in to your qbo account you need to edit the link. If you are on your dashboard then this is how the link would appear app.qbo.intuit.com/app/homepage. All you have to do is replace the last section “homepage” with “exportqbodatatoqbdt” & press enter.
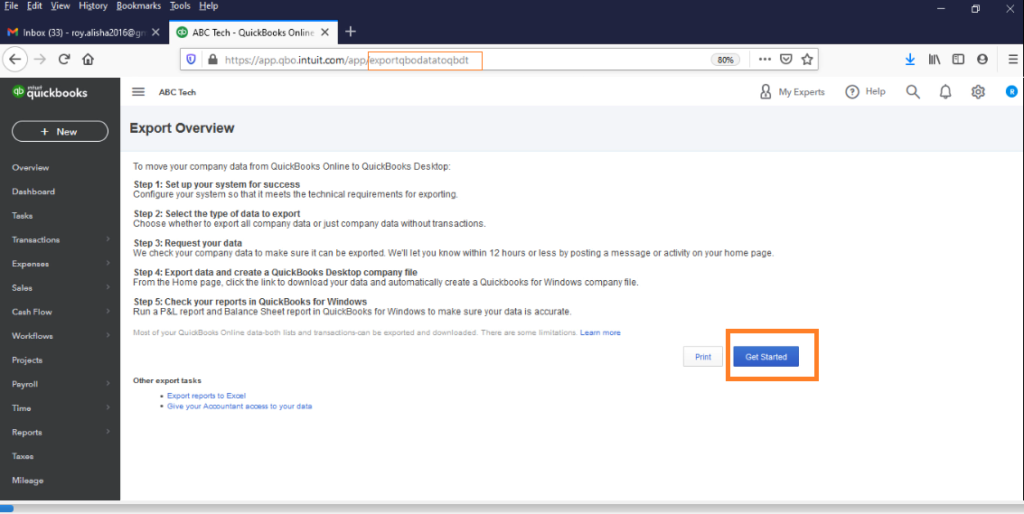
Once that done it will take you to Export Overview screen through which will have the option to transfer all data including transaction.
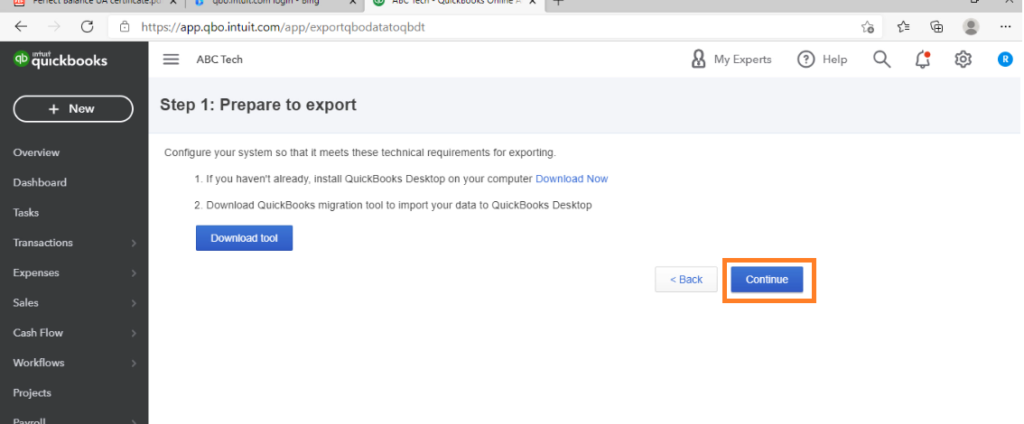
Click on “Get Started” & the next screen will ask you download Quickbooks desktop & Quickbooks migration tool. Assuming you already have Quickbooks desktop go ahead and download the Quickbooks migration tool & click continue.

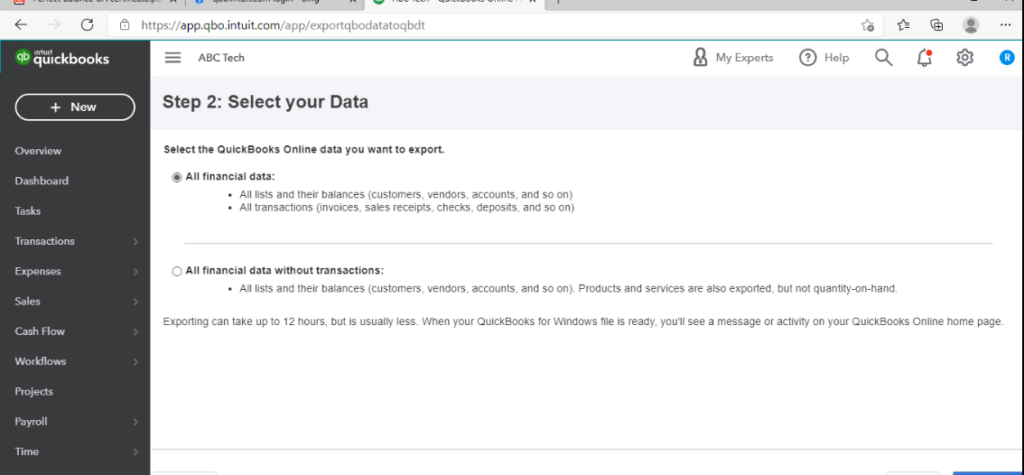
The next screen will ask you to select what exactly would you like to migrate. Obviously, you want everything therefore select “All Financial data” & click on continue.
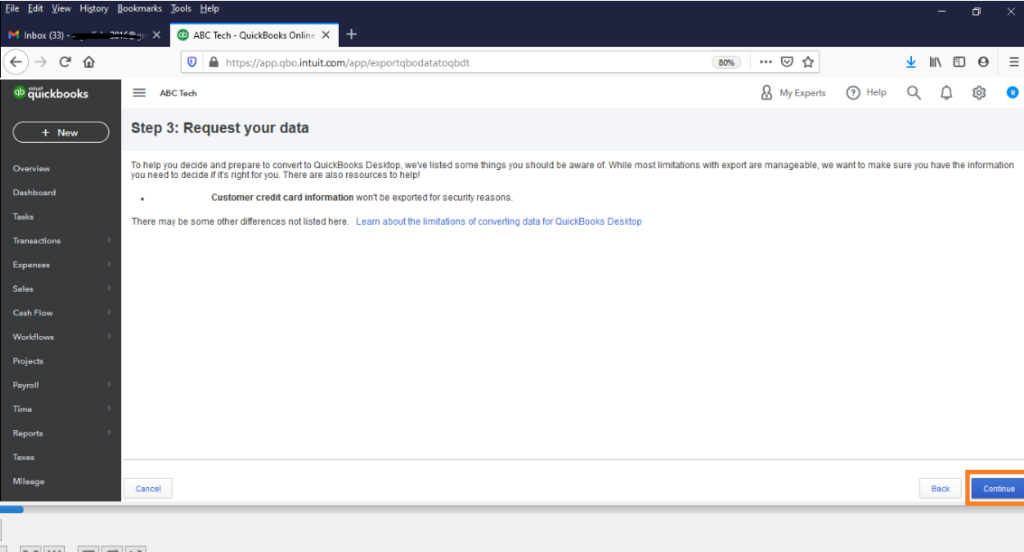
The next screen will show you the limitations therefore nothing to do much. Just click on Continue.
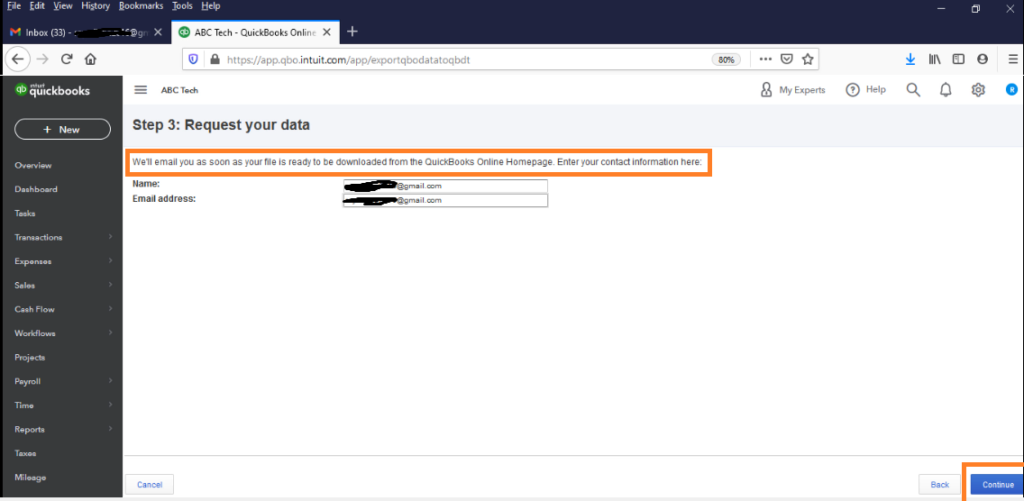
Once click on Continue the next screen will tell you that the request has been submitted & you will be notified via email & once its ready the downloadable file would show on Quickbooks online homepage but trust me, it wont show up. We would again have to use our mantra “export qbo data to qbdt”
But for now, while we are waiting for the email confirmation go ahead and install Quickbooks Migration tool which you have downloaded earlier and also Quickbooks desktop if its still not installed on your computer.

.png)
While you are on break you should get an email confirmation regarding the data being ready. I got mine within 15 minutes.

Step – 2
Here onwards login to your Quickbooks online via Microsoft Edge & as mentioned earlier “Download the company file created on MM/DD/YYYY” is nowhere to be found so let’s see how to use the same Myntra again.
Get back to your QBO dashboard using Microfoft edge & once again update the url by replace the word “homepage” with “exportqbodatatoqbdt” as mentioned on step 1 & it will take you back to the same overview screen followed by same options until step-4 on QBO online.
Just click on “Get Started” on the export overview screen.
By now you must have installed Quickbooks desktop & Quickbooks migration tool therefore ignore the downloads & click on continue.
Select “All Transaction data” & click on continue & the next screen will give you the option to download the file.
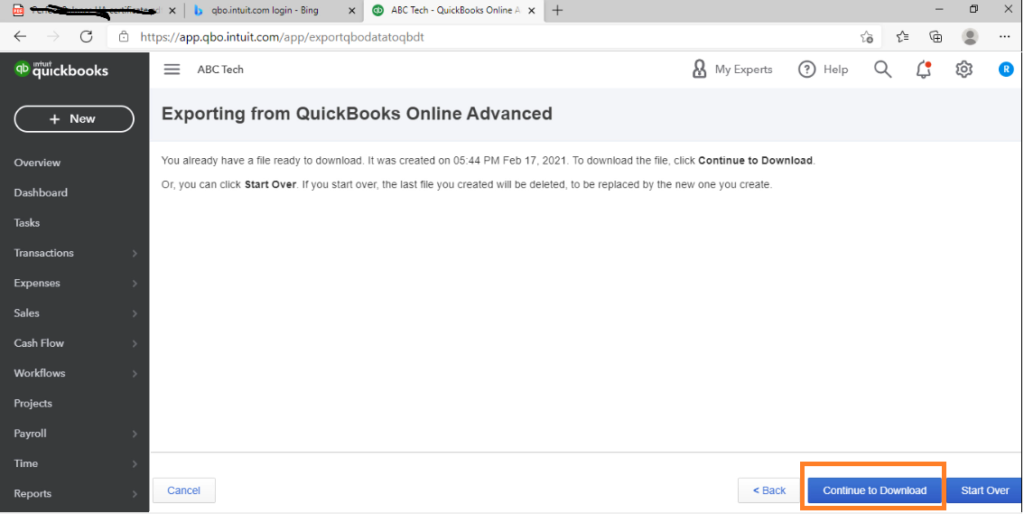
Click on “Continue to download” & the next screen will give you the option to download QBXML file.
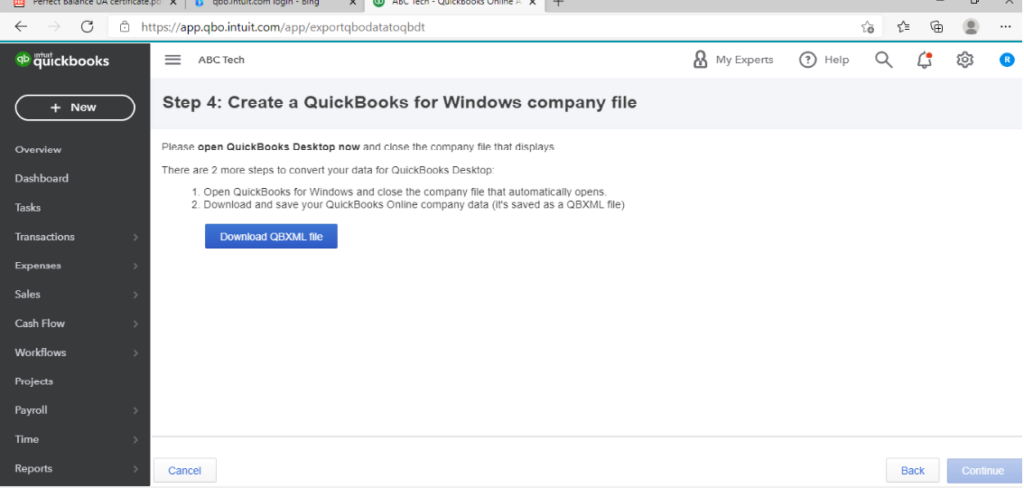
Once clicked on “Download QBXML file” it will start the download and may take some time depending on the file size, internet speed & computer configuration. In my case it tool around 4-5 minutes.
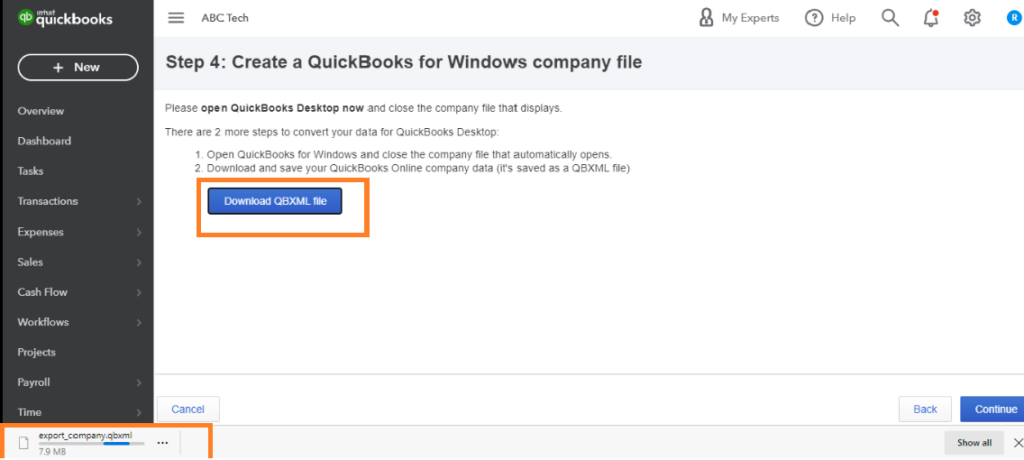
Once the download is complete you are done with QBO. Its time to go ahead & import the information in Quickbooks desktop.
Step – 3 – Importing qbo data in qbd step by step.
1: run quickbooks & quickbooks data migration tool, both as administrator.
2: Close any company which might be open in quickbooks and be on the “no company open” screen.
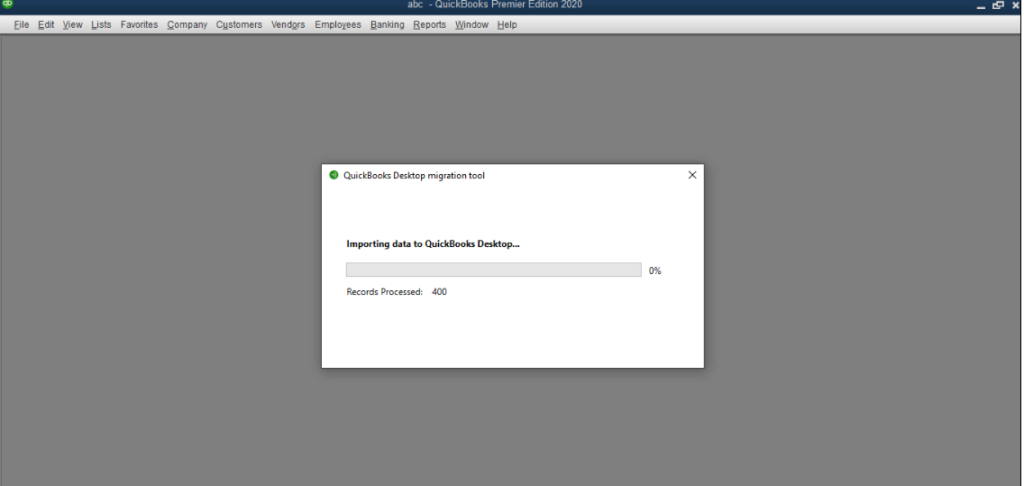
3: Select the downloaded qbxml file using the browse button on quickbooks migration tool & click on import as shown in the screenshot below. In my case I am using Quickbooks premier 2020 as destination file but one can download it in any version of Quickbooks desktop 2014 onwards.

The next thing it will ask you do is to create a quickbooks desktop file therefore select your preferred location & give a file name. In my case I gave the file name as ABC tech
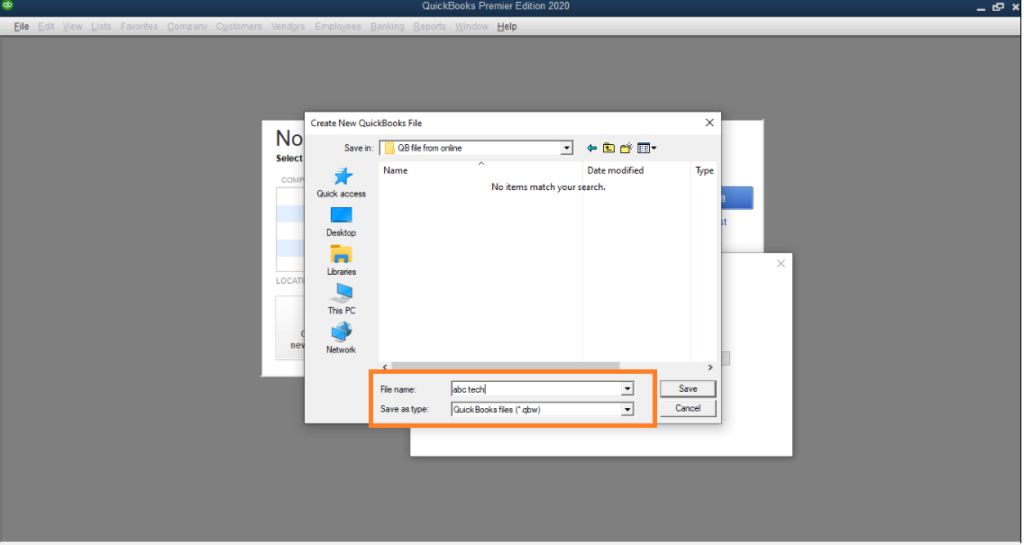
Once clicked on save it will start the migration process.
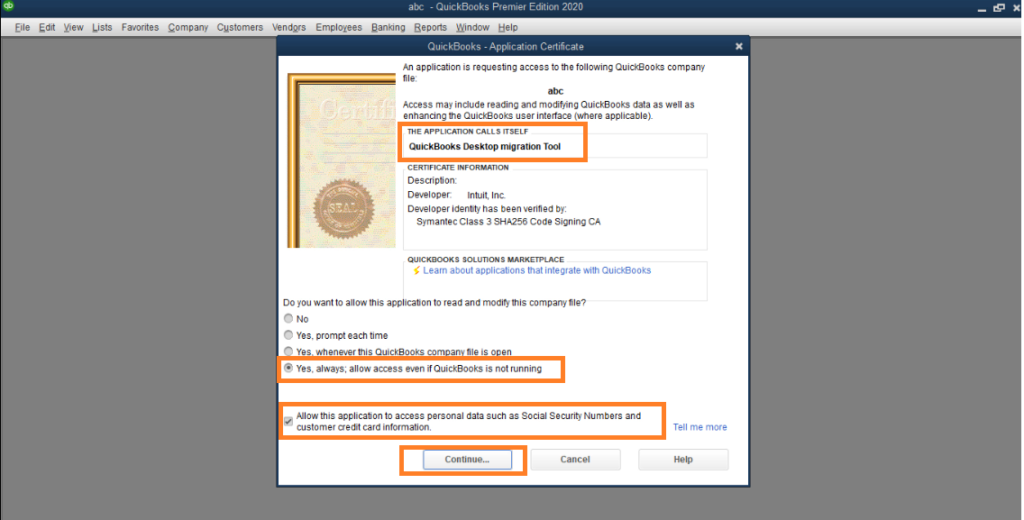
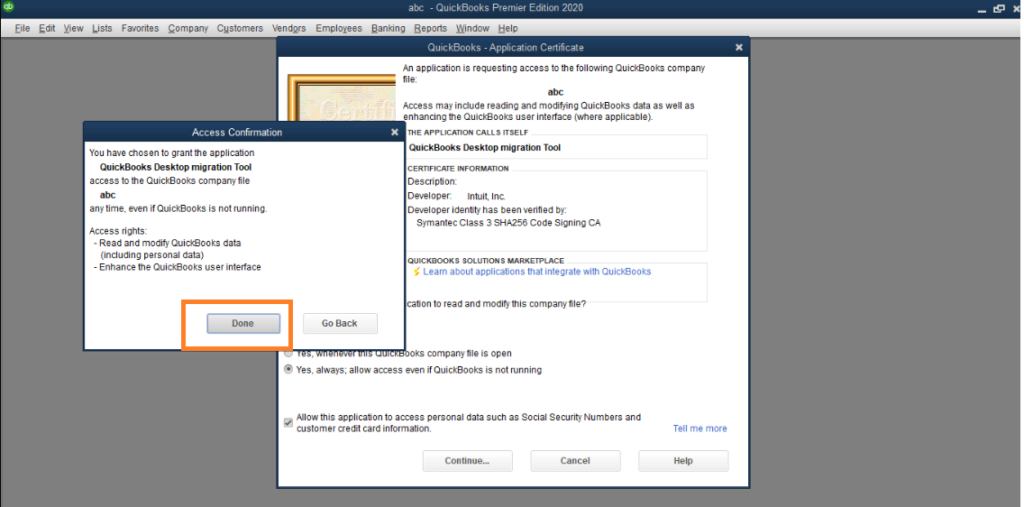
& shortly after that quickbooks would need your permission to authenticate “Quickbooks migration tool” therefore select “Yes, Always” also select the option for sensitive data (optional)

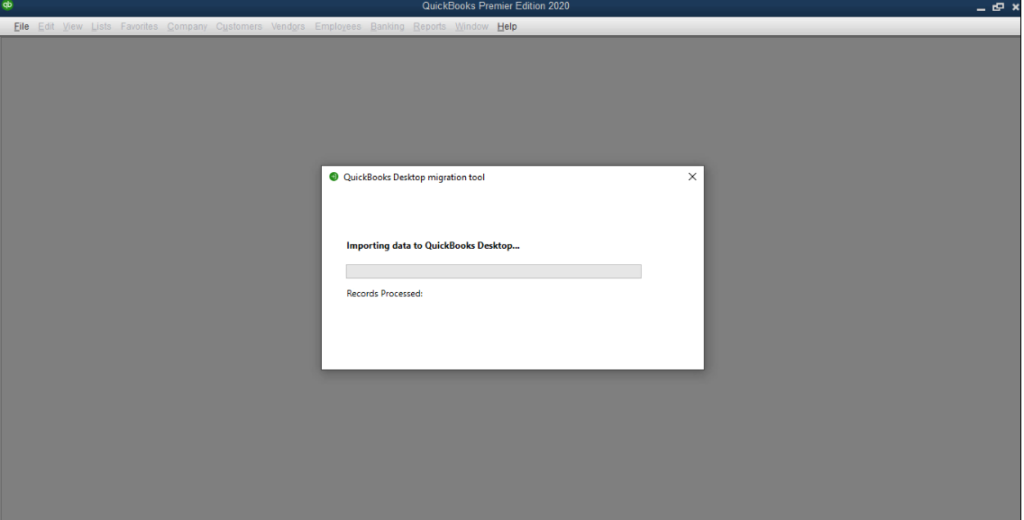
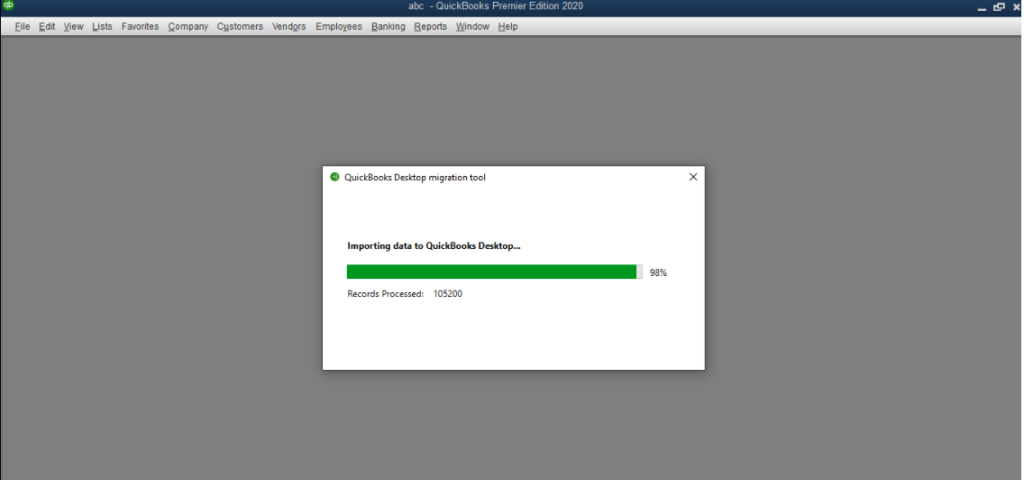
Once authentication is complete it will start the migration process again.
In my case it took around 40 minutes to go from 0% to 100%

And Finally.
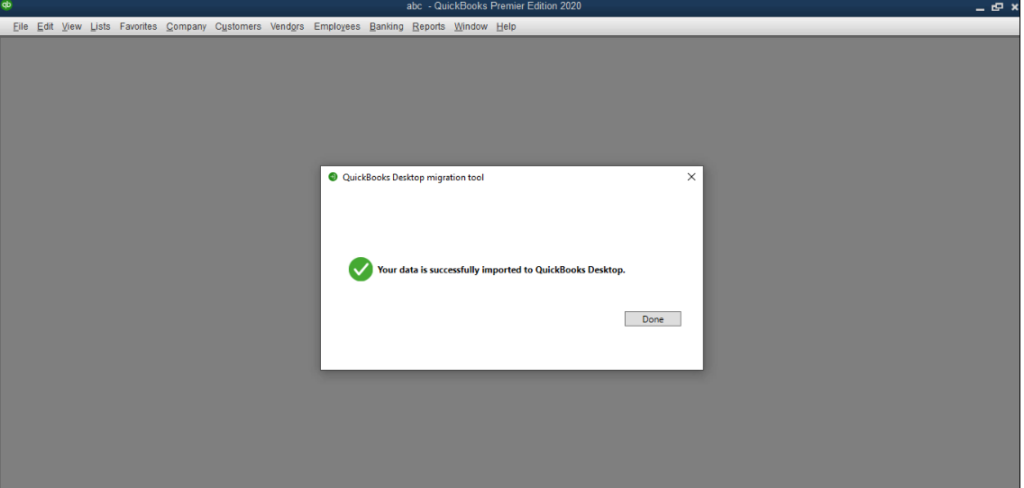
Once you have this message just click on done & check the data in your QuickBooks desktop file & it will have all the financial transaction as well as list & reports.
Using this method you can easily convert a QuickBooks online file to Quickbooks desktop & if this post of mine really help you then feel free to buy me a coffee. 😉
For any further queries or issues you may reach us via comment section.