

Quickbooks desktop to Quickbooks online conversion is simple & straightforward, however if not done in a proper way, can cause problems therefore lets see the correct way to move your Quickbooks desktop file to Quickbooks online step by step.
Step 1: Create a intuit account.
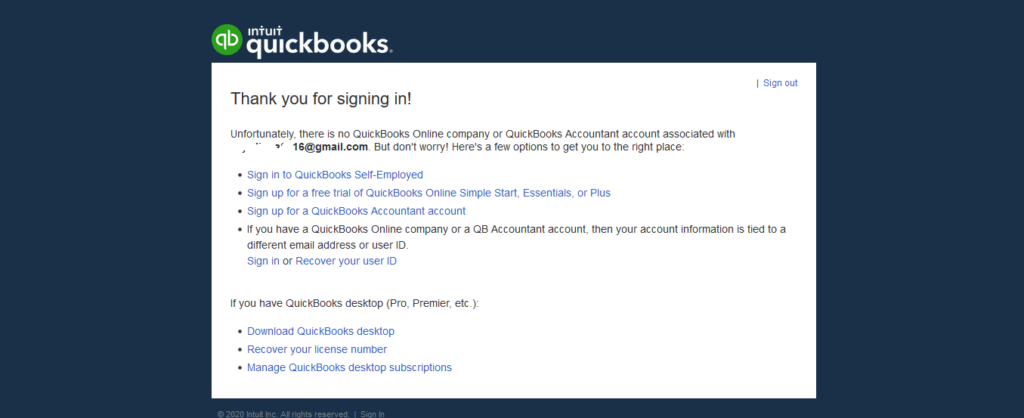
No need to select a product or make any kind of payment at the moment. Simply crate an account. Once create & if you sign in, This is how it would look as you don’t have any products but have a account on intuit server. This is fine because this will simplify the next steps.
Step 2: Prepare your Quickbooks desktop File
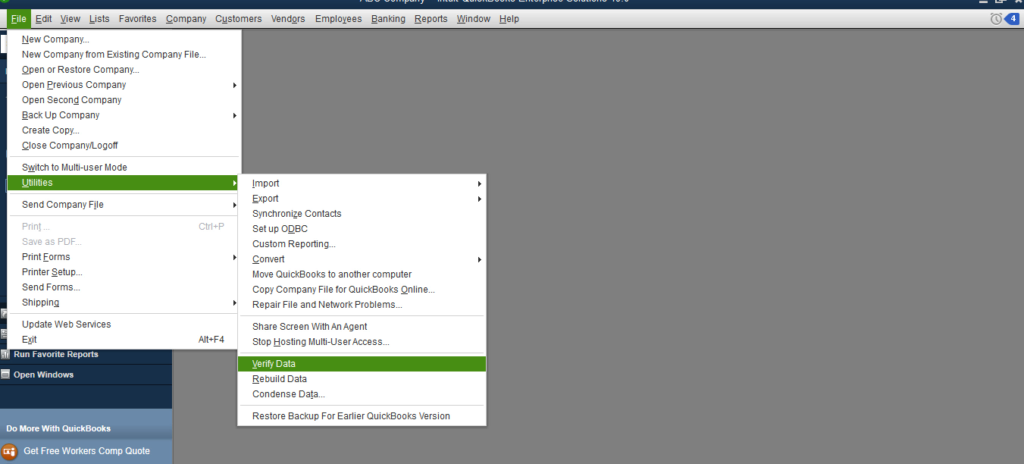
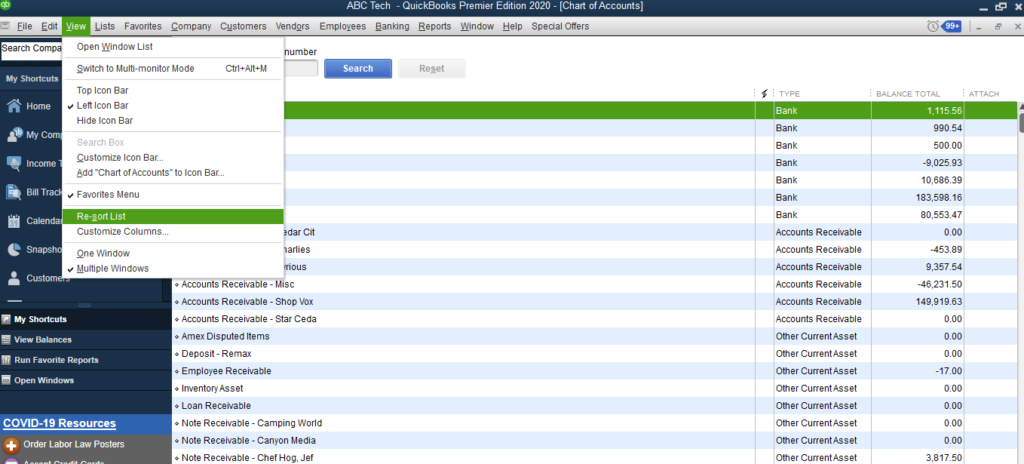
Open your Quickbooks desktop file & run a verify. If required also run a rebuild & also resort all the lists. To resort lists open all the lists one by one resort it either by going to View Menu & selecting “Re-sort List”
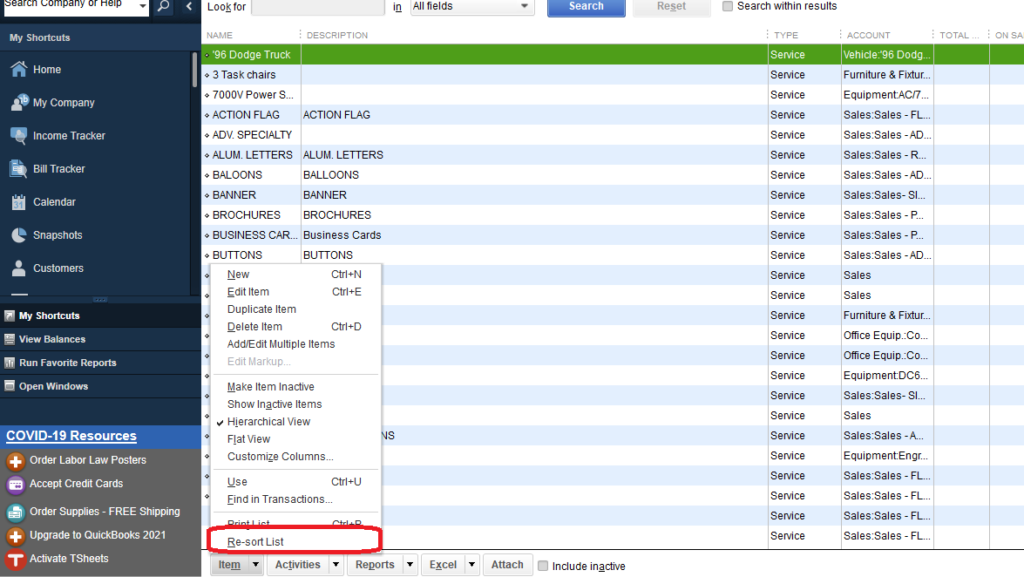
Or in some of the lists like Price level list, memorized report list and a few more in which you might find the “re-sort list” option missing under View menu however you need to re-sort it using the bottom left button of the list.
Step 3: Upload for Quickbooks online.
To upload your quickbooks desktop file, quickbooks pro/premier users have 2 option & enterprise users are limited to one. In Quickbooks pro/premier one can navigate from company Menu & select “Export your company file to Quickbooks Online”
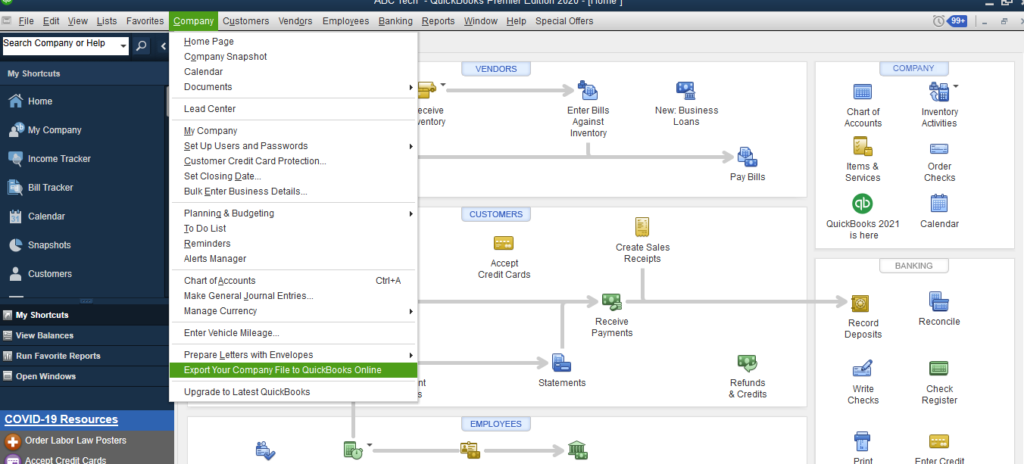
Once clicked on “Export your company file to Quickbooks Online” it will open a browser to proceed further.
Second option for pro/premier & Enterprise Users
The second option dose the same job but old fashioned way, to do the old fashioned way or the only way for enterprise users, first open the product information page & one can access that page by pressing F2 while they are on Quickbooks.
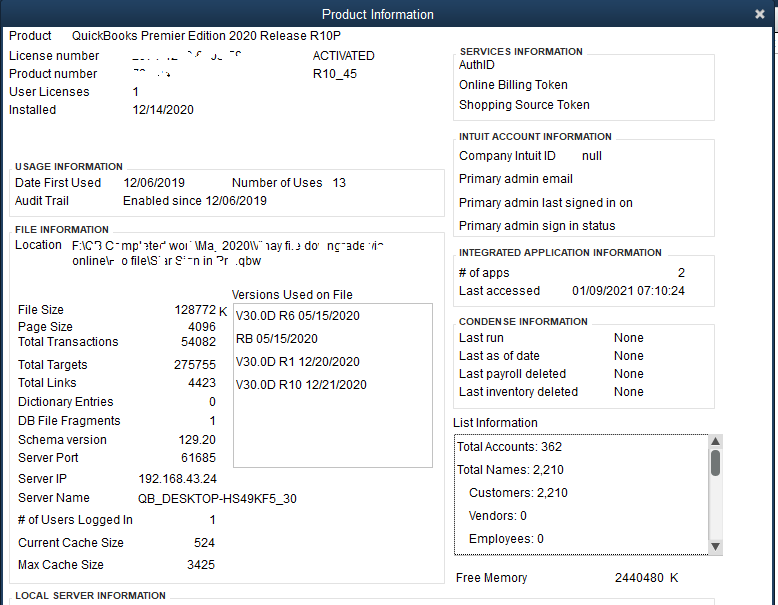
Once you are on the product information page press CLTR +B+Q
Once done press the “Ok” button on the product information page & it will open a web browser to proceed with the migration process.
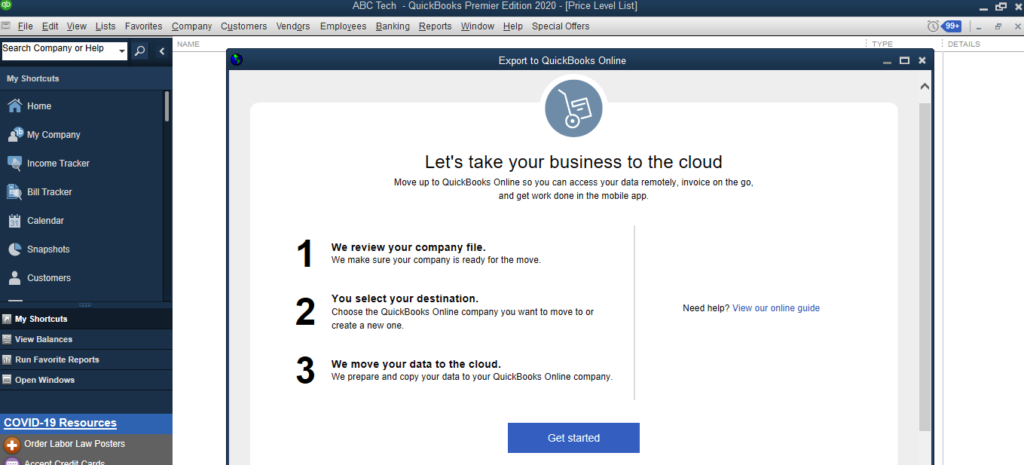
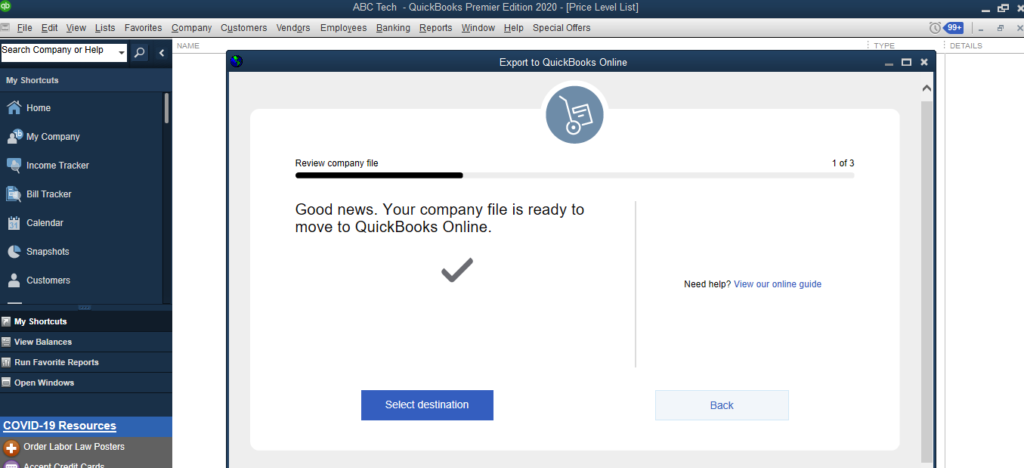
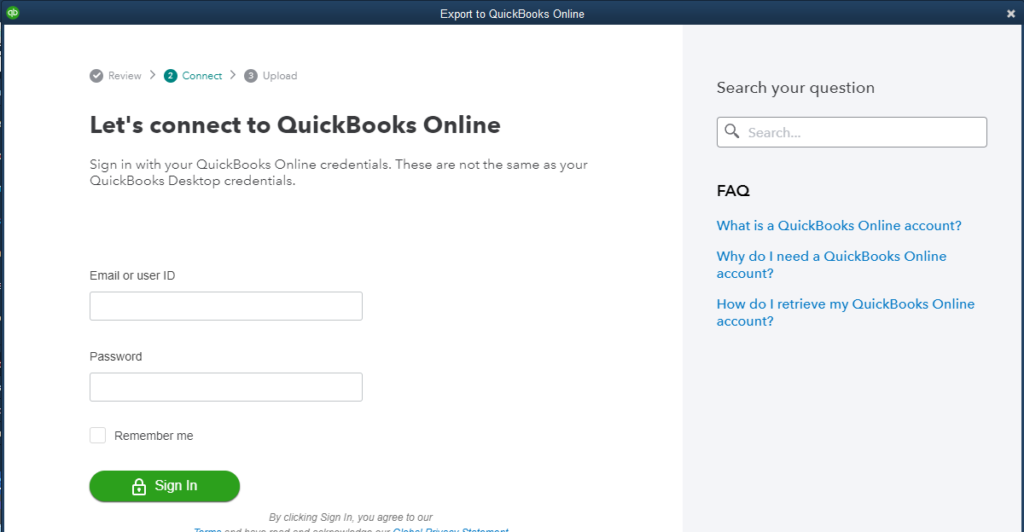
After clicking on “Get Started” it will analyze the file & ask you to select destination by taking you to the login screen.
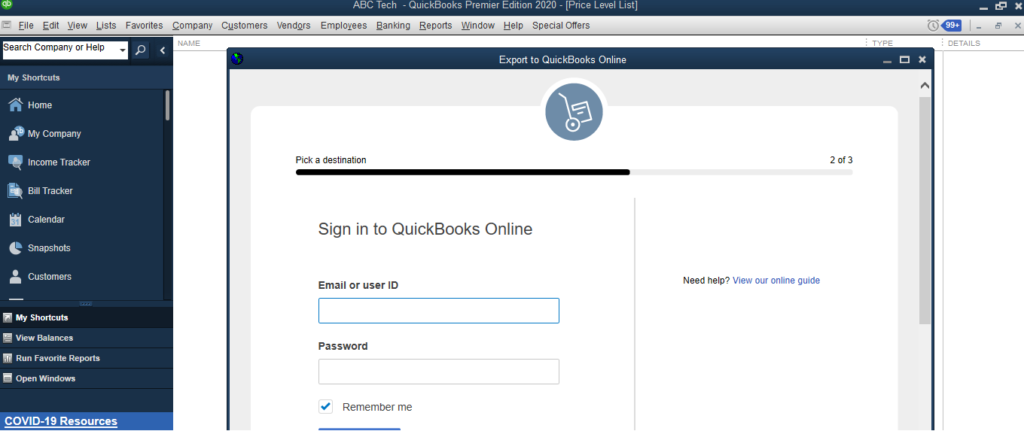
On this screen login with your intuit credentials created earlier, This login requires authentication which is verified by an OTP sent to you mobile or email depending on your selection
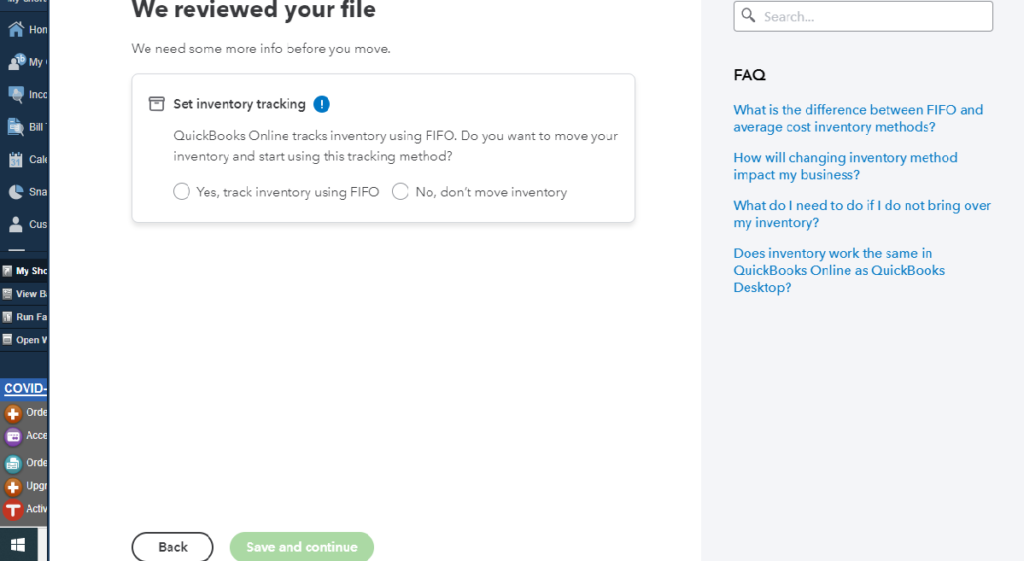
Once logged in successfully it will first ask you if you want to bring in your inventory using the FIFO (First In First Out) method instead of average cost.
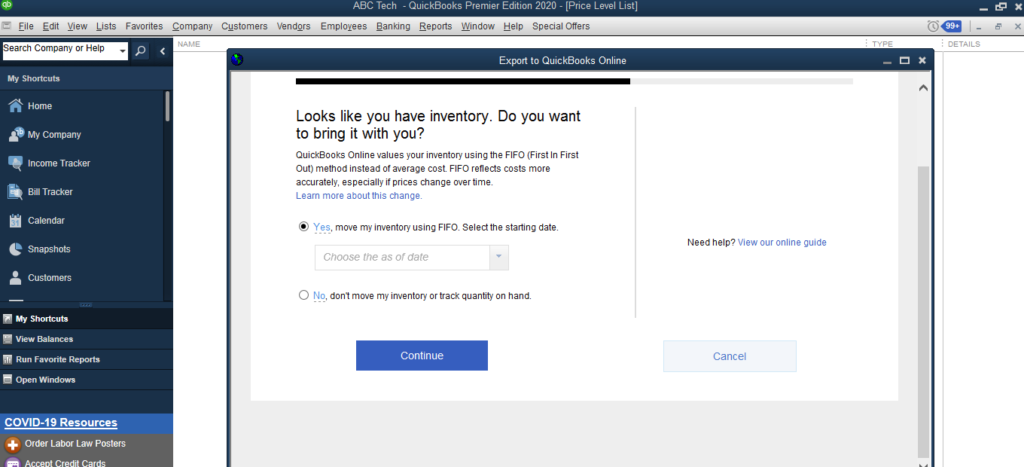
Select your appropriate option & click continue. Once clicked on continue it will automatically transmit data & show you a message about the movement of data. Transmission of data can take anywhere between 2 to 10 minutes depending the the file size and complexity. Once you get to this screen its time for you to treat yourself with a coffee. 😉


while you are enjoying your coffee you should receive a mail from intuit about the upload confirmation which would look something like this.

Step 4: The final outcome
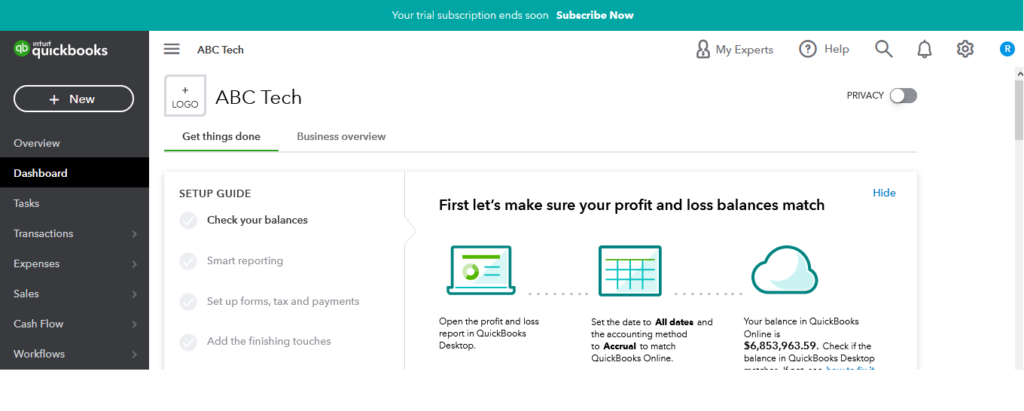
Once you have this mail from intuit in your inbox it means conversion is successful & complete. Just login to your QBO account with the same credentials & it will automatically redirect you to your Quickbooks online file after asking you some basic information like name & your role in the business.
The above screen shots were taken from the 2nd option requires you to proceed with Product Info screen (F2) & Clrt + B+Q which works for both pro/premier & enterprise however if you go by the first option which is Company Menu-“Export your company file to Quickbooks Online” it will take you through the same steps but the layout would be a little different.
Below are the screenshots if we go by Company- “Export your company file for Quickbooks online” option
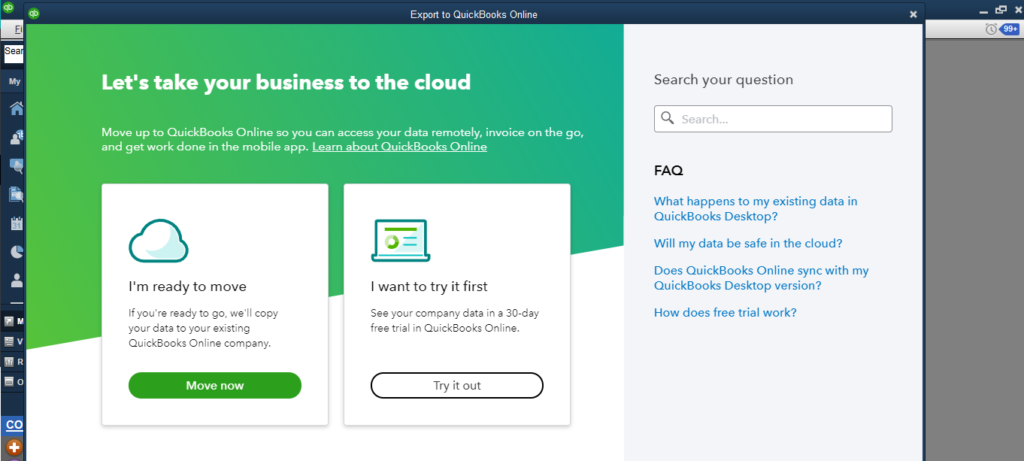
Select the option “Move Now” & select the appropriate inventory option
The third scree will ask you if you already have an intuit account or not?
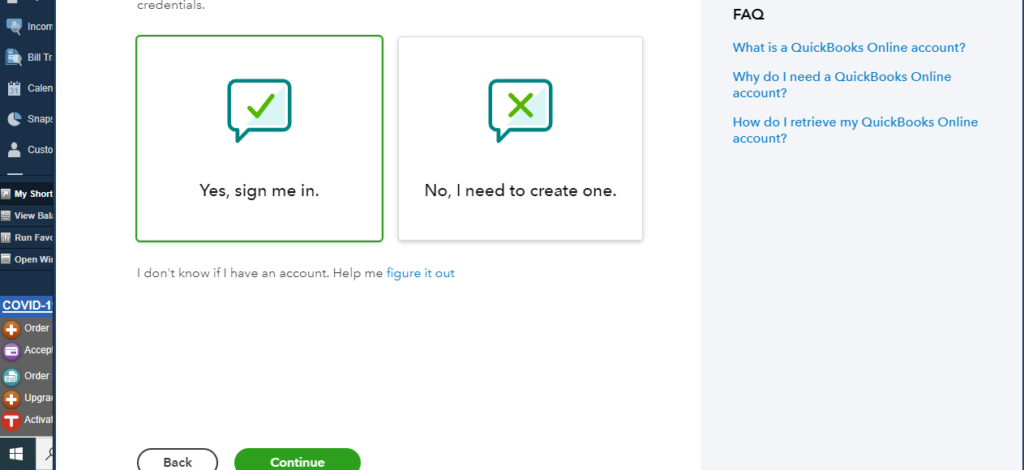
Select “yes, Sign me in” and use the same credentials on the next login screen.
Once you try to sign in it will authenticate you with an OTP through email or mobile & get you to the same screen where you had some time for a coffee.
After the confirmation of successful upload you can login to your qbo account and check the converted file by yourself
How to verify the converted data
Run some basic financial reports like profit & loss, Balance sheet trial balance, Chart of account & compare the same on Quickbooks desktop file along with Quickbooks online. If the numbers match then everything went fine.
If you are nervous or having difficulty converting from QBD to QBO the contact us to get the work done.
